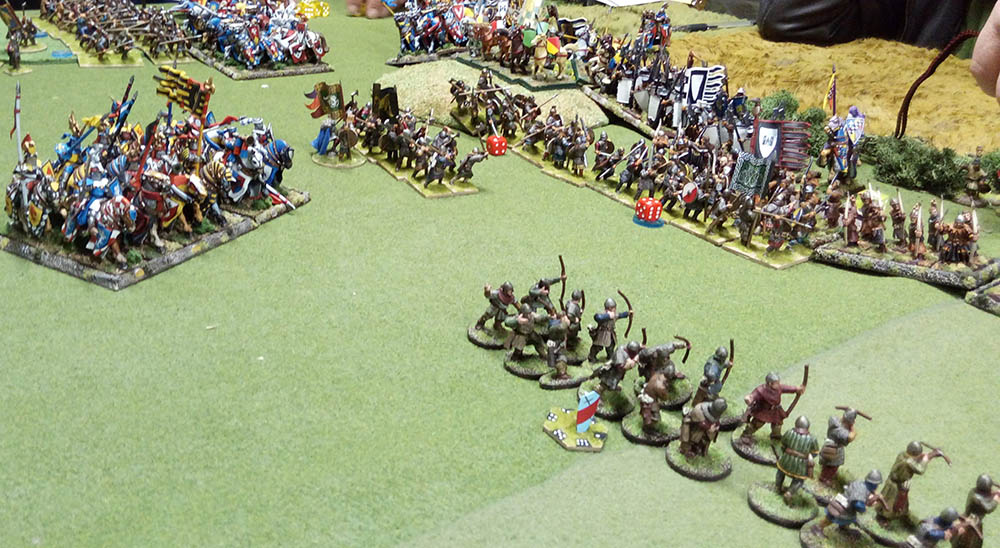
Friday, 28 September 2018

Recce Screen - 500pt Battlegroup Game

I played my third game of Battlegroup yesterday. I took a long, cold, wet drive out to Ballarat to see Adrien (who I first met a few years back) at his house in the wilderness. We talked a lot and then got down to one of the simple scenarios from the Overlord - Battles Beyond the Beaches book.

The game saw a British mechanized infantry platoon meeting a panzer grenadier kampfgruppe as both sides decided to scout a hamlet somewhere in Normandy. Using an intricate random selection process (umm... left hand. Here you go!) I took over command of the kampfgruppe and Adrien, with a regulation cup of tea in hand, took command of the Brits.
Both sides were pretty equal with a mounted platoon each & the Brits also had a carrier section. There were also some other subtle variations. The Germans had an off-board mortar battery waiting so it was easier for them to get small, local stonks into play. The Brits had a 2+ First Target Priority for their artillery. The difference being that they had the chance to call in larger caliber guns if needed. The Brits had a Cromwell platoon in support against the German's platoon of Panzer IVH's.

The Recce Fight

The scenario starts with a small pre-battle fight. All reconnaissance elements are deployed - A d6 is rolled (we rolled 3). So for three turns the recce elements fight it out. The results can gain the players a bonus when rolling for initiative for the first proper turn.

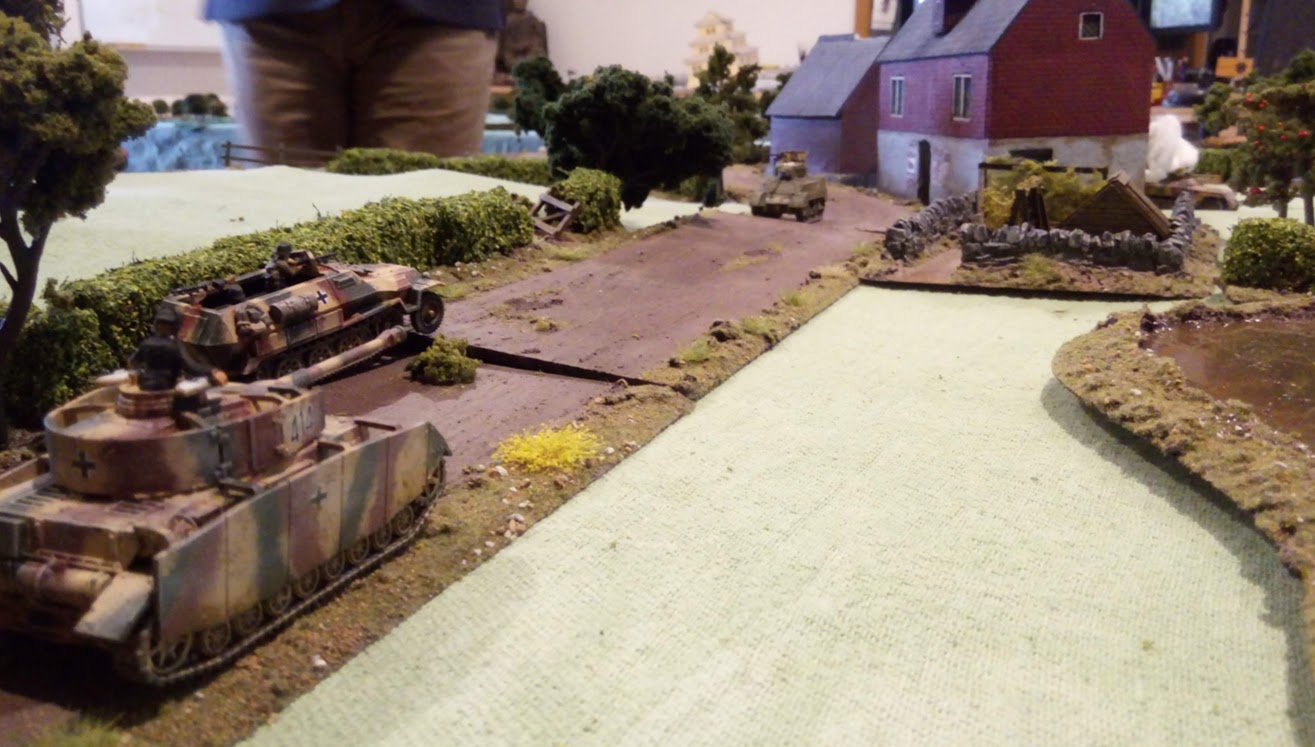
German initial deployment - Sdkfz 250/9 and SdKfz 251 recce.

The British recce consisted of a Dingo Scout Car (in the distance) and an M5 Stuart.
 We played a bit of cat & mouse with the M5 Stuart firing a shot across the bows of the SdKfz 250/9 causing it to pull back an find a better opening. It moved between the buildings and emerged to take on the Dingo. Unfortunately the Dingo called in a very accurate mortar stonk which resulted in a direct hit taking out the German.
The Stuart chased my halftrack back down the road almost into my deployment zone. It was going to take a shot but couldn't get a clear line of sight (missed his observation roll).
So, my brave men lost the Recce Fight but the dice decided that I got the initiative anyway.

The Battle

I brought on my reinforcements first and my first action was to bring on a Pz IV to blast that Stuart. There must have been a thick mist this close to the stream, because I couldn't see the M5 clearly enough to get a good shot in. A second panzer appeared and did have a clear shot. But it went wild and missed. I also brought on a Pz Grenadier section and a heavy MG42 crew.

With things getting hot the M5 pulled back but not before calling in another accurate mortar strike on my cramped troops. The effect was nasty: the halftrack crew abandoned their vehicle, the pz grenadier's truck was destroyed and the Pz IV pinned. Schweinhund!
Adrien rolled poorly for his first turn Orders so didn't do much more. But he brought on the mortar from the carrier section and a Sherman Firefly. That said his mortars did enough damage causing me to draw another two chits (3 so far and it's only turn 1!).

I next brought on some more troops incuding my 3rd Pz IV. This was actually my platoon commander and showed why he was in charge by taking aim at the M5 and leaving it a burning wreck with a single shot.
This gave the Germans the chance to push rapidly up the road and secure the buildings.
As this was happening the Firefly took up a commanding position in the center of the table covering the advance of one Cromwell in the center and the other Cromwell, with supporting infantry in an M5 halftrack making a flanking maneuver behind.
Various maneuvering on both sides now took precedence for a turn or two along with some MG & indirect fire and . I moved my infantry command and an MG34 into the large building and called in some mortars against the Dingo and Firefly but they had little effect. The Tommy's brought on their Forward Arty Observer and brought a 25pdr stonk onto my troops in the buildings and managed to pin a rifle team. I pulled a chit and unpinned them along with the Pz IV previously pinned.


As things progressed I moved the unpinned Pz IV up into a wheat field to take on the Cromwell and infantry trying the flanking maneuver (on my right). I supported the tank with an infantry section and a panzerschreck crew (but forgot to take photos).

In the center, I moved my remaining tanks up the main road being cautious because of the Firefly. This did attract attention from the tank killer which was on an Ambush Order. Lucky for my it failed to observe once and failed to score a hit a second time. My move caused the Cromwell on the road to redeploy closer to the center.

On my right my Pz IV moved in close out of a wheat field and blasted the Cromwell and sprayed the supporting infantry deployed behind a hedge with it's MG's. The Cromwell was destroyed and the infantry took 5 casualties. Deciding that discretion in the better part of valour they chose to fall back and to minimize their casualties.

Unfortunately, this attracted the attention of the Firefly which sent a round into my tank smashing it to flinders. Some newly deployed infantry in the center with a Vickers MG in support shot up my infantry support but they managed to use their cover effectively and took minimal casualties but they did get pinned. Ach du lieber! 

I managed to bring my MG34's into play as well as my MG42. This resulted in pinning the Dingo, taking out and pinning some infantry including the Vickers.

On my center right my Pz IV's were in commanding positions but I failed to take into account a lone Bren Carrier in a field. This turned out to be a mistake as it was carrying a PIAT. These men moved up, deployed and took aim at one of my tanks which, with a great whoosh and a bang burst into flames. Getting cocky they then took aim at the rear of the next tank but (luckily for me) they missed.
 Vas ist das?
KABOOM!
Checking line of sight the big boom drew the attention of my on-board 80mm Mortar. Four rounds of direct fire HE later and the PIAT team were all gone. If they had withdrawn after the first shot they would have escaped notice. Greedy Tommies!

For a turn or two, my tanks had been trying to get a shot at the Firefly but kept failing to observe it. But now my single remaining tank got a clear shot, took aim and took it out with a single shot. With the same action it took aim again and destroyed the Dingo. Well done men.


The RAF Save the Day

Once again, misfortune struck the German attack. Even with the loss of a couple of tanks the situation was looking good for the Germans, but then a roar was heard in the skies above and a Typhoon swooped in and fired a salvo of rockets at the victorious Pz IV. The destruction of the Dingo resulted in Adrien pulling a chit and it was the Air Strike chit. He rolled for it at the start of his next turn and it appeared immediately. Eight rockets fired, two direct hits and the Pz IV was no more.


This pretty much ruined the ability of the Germans to continue. They were not broken and still had  about a third of their Battle Rating remaining but the loss of all their armour put them immediately on the defensive. 

At this point we called the game.

Final Result:

My infantry still held a fairly strong position in the buildings and could most likely have held off a British attack although they Brits could call in some strong artillery to try and pin them. In reality the Brits would either hold their positions or withdraw and call for more reinforcements.  Game wise, the Typhoon was still on the table and armed with bombs which could easily take out my less well concealed infantry if we played a few more turns (but it was getting late).

Conclusion:

It was a good game. I like a lot of the rules and really have an affection for the importance and use of comms. Not all games have this and even though it's simple I like having them included. 

One thing that I feel the rules lack is hidden movement. It's easy to say the Observation Rules cover this but they don't. It's too easy to react to something you can clearly see even if your troops are supposedly unable to see it. 

We also decided to make our troops observe before taking speculative fire. Both Adrien and I are former soldiers and we know that troops don't just shoot up an area in the hope that something might be hiding there. Personally, I like the Two Fat Lardie's use of blinds and their rules mechanism for them. I'd like to House Rule them for use in Battlegroup.



Friday, 21 September 2018

My Successor Army is Growing

As mentioned in my last couple of posts I'm currently back to painting up troops for my Successor army. The army is a pretty decent size now. I have 4 units of phalangites of 32 figures each, one medium foot Agema (24 figures), 3 units of thureophoroi (18 figures each), two (or maybe 3) units of euzonoi/javlinmen, two units of Thacians, Cretan archers & Macedonian archers, Macedonian & Thessalonian cavalry and, two elephants.

If I want to,  I can also add about a dozen units of allied Greek hoplites, some cavalry, peltasts & slingers. I've never set them all out on the table, but it will makes up a pretty formidable force if I do.

But I still need more - Especially sarissa (pike) armed heavy infantry. My plan is to make three more units of pike as well a unit of hypaspists. I've also started prepping some Companion Cavalry.

However, I've finished a few more little units recently - My 2nd unit of Thracians and my 3rd unit of thureophoroi. One thing I think I'll need to do is enlarge the Thracian's from 4 bases to 6 bases each.

I also painted up a bolt thrower.

All figures are Xyston 15mm.


Sunday, 16 September 2018

Republican Roman Test

I haven't done much worth posting but, as it is, I'm back to painting 15mm ancients at the moment. I've painted up a bunch of phalagites to finish up my Successor pike blocks (they were three ranks deep but I wanted them 4 deep). I also finished up a unit of Thracians foot & Thessalonian horse.

I should take some photos and post them. Maybe when I've done more.

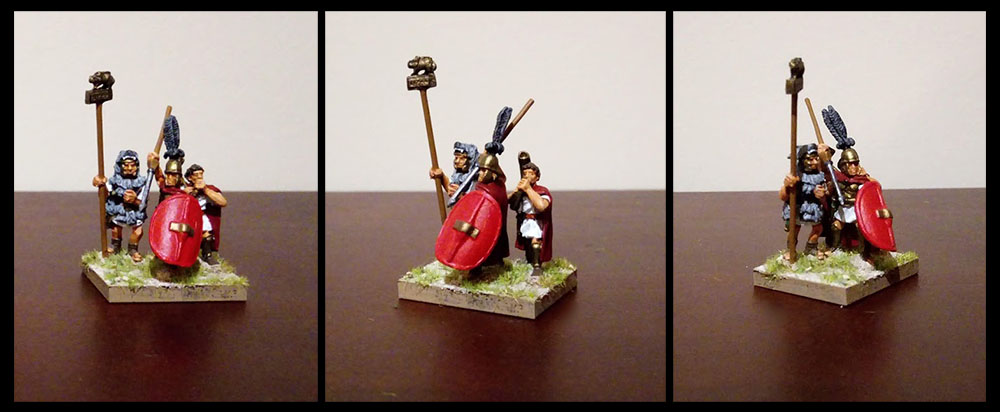
I also painted up a few 15mm Republican Romans that I was given a few years back just to see how they looked. I've been wanting Romans for a while because they fought everyone so they're rarely out of place. I did do some 28mm Cesarean Romans a while back but I decided to sell them as I prefer ancients in 15mm.

Anyway, I painted a few up. They were easy to paint but I wasn't happy with them. The consensus of the Collective Wargaming Mind of Nunawading Wargames Association decided the shields were too plain: and I agreed.


So I did a quick freehand design. It's not the best and I took all of 20 minutes out of my busy day to do them. But they do look better and I'll put more effort into them when I start these guys seriously.
I do have a mixed bunch of Xyston figures to get me going but I've ordered enough to make 2 legions. Looking at various rules it seems 4 bases of Hastati, 4 bases of Principe, 2 of triarii and 6 of Velite/militia constitute a legion. But I'm not convinced. I think double that is probably better. (I don't want crappy little battles. I want battles of epic proportions).


Friday, 31 August 2018

The Dice are Cursed ~ Macedon v's Sparta

It's been a while since I last posted because I haven't done much worth noting (just finishing off odd bits and pieces for different things).

For the time being, I've shifted my focus to getting some more 15mm ancients finished. I was also lucky enough to get a game with them last night (Friday) at our club's new venue at House of War in Ringwood. HoW is a bricks and mortar store which is very well appointed. It's large, has plenty of space (and tables) for gaming, modeling and hanging out. But more on that later...

I introduced Lorne to a game of Sword & Spear. You may remember Lorne from my last post. He commanded the right of the enemy forces in my last post. Introduce I say... I hadn't played S&S for quite some time and had forgotten about 80% of the rules but I did remember the basics like the turn sequence & things like that. I also had two 400pt armies to pit against each other.

This was the first time I got my un-blooded Successor Macedonians/Antigonids onto the table and they faced off against a rebellious Sparta and her allies.

I won't go into details of the game because I forgot to take photo's toward the end of the game as my phalanx crumbled when the Spartans got into their flank and rear. But I will say that the "Dice" had decided who to favour (and it wasn't me).

I started with less dice in the bag - 15 to Lorne's 18 but that was no major issue. However, some outrageous Discipline Test die rolling by the Spartans saw the Macedonian advance stopped in it's tracks. Then the loss of one, then two then three light/skirmish units saw my dice pool shrink to 12 to 18 and I couldn't recover any initiative. And it just got worse from there. It also didn't help that it was at this point the dice decided that favouring my opponent wasn't enough. Now they decided to punish my own rolling just to rub salt into the wound/s.

O Fortuna, Alea iacta est...

Towards the end I managed to get my aegema into the action and they pummeled the Spartiotes. Only three of their hoplite units were actual Spartans - The rest were undrilled allies. Still strong heavy foot but less maneuverable. 

My elephants also got into action early on and a prolonged fight took place on my right flank. This was where the first Outrageous Discipline Test roll took place and the Spartans who should have been trampled into the dust withstood my mighty pachyderms. At least they stomped the allied Thracians flat.

Anyway, as Marty Di Bergi said: "Enough of my yakkin'." Here's some photo's.


 The phalanxes closing in...


The Cretan Archers who stopped my Companion Cavalry dead
with yet more Outrageous Discipline Test die rolling.


The Dead Pool.


Saturday, 11 August 2018

The Battle of Castle Hemmingstein

Verily 'twas a rainy day in Croydon and the massed armies of Noirebrûlure, the Hemmingsaetic League and their uncertain allies took to the field of battle.

This was big medieval battle using the Hail Caesar rules with everything we could muster and put onto the table. To make up numbers Anglo-Saxons & Norman knights were recruited as Heathen Northern Hillmen, on the Hemmingsaetic side and Bretonians made up the numbers for Noirebrûlure.

For the uneducated; Noirebrûlure and the HL are medieval imagi-nations created by my opponent Mike & I. So if we want heathen hillmen that look like suspiciously like Anglo-Saxons we can have them (although Bishop Eisenwurst did place a warrior priest with them to speak the word of The Lord and keep them in line).


Castle Hemmingstein is a card model from Russia. It cost me 
about $15AUD and took about 90minutes to put together. It's increadibly 
detailed and opens out so you can see all the inside detail.
We had nine players all up.
Half of Lorne, Lewis, John, James and Mike for Noirebrûlure.
 I'm missing - Paul, Tom, James for the Hemmingsaetic League (and the other half of Lorne).
Here I am...

Once again let us, Cry Havoc, and unleash the Dogs of War!

Graf von Rickenbacker and Comte Michel de la Noirebrûlure met like noble knights between the armies and tried to sort this out before it came to blows but... You know how it is when large groups of aggressive men dressed in metal get together!
The Hemmingsaetic League arrayed for battle


The Noirebrûlure host
 They a have a lot of bloody archers.

 The Northern Heathens under their King: Æthalguy the Seeker

 Castle Hemmingstein with Frau von Rickenbacker out for a ride.
 I can't help but think some people were not taking this seriously.
Ye verily, von Rickenbacker opened the proceedings and moved his crossbows forward. Unfortunately they didn't manage to get into range. The heathen allies on the left also moved forward as too did the host of Noirebrûlure. 
Seeing the thin line of archers before them von Rickenbacker urged the Norman knights in the center to charge. They hesitated (Paul rolled a crappy command roll). At the general's urging they surged forward but lost momentum (I used the General's Re-Roll but also rolled crappy) and they fell short. They would pay for this.
The Norman infantry also moved up and began an lively archery dual with their opponents. 
The heathens move up slowly and sent their skirmishers forward. They inflicted some casualties but unfortunately, they were charged by some light cavalry and dispersed. In the center the HL crossbows were shot at by the Noirebrûlure archers and fell back in good order. 
Graf von Rickenbacker, bravely leading from the rear.
The crossbowmen of the Teutonic Order, on the extreme right, took aim at the Noirebrûlure  knights and inflicted some casualties but in turn they were charged. They fought well but were pushed back in good order. The knights didn't follow up because they would have ended up locked in melee in a bad position so the Teutons  managed to escape destruction.
In the center the plodding Norman knights were shot up by the line of archers and received some casualties. But a trebuchet located on a hill under the command of Lewis lobbed a big rock at one unit and forced it to retire. Comte Michel, seeing an opportunity, charged into the leading Norman unit and smashed them.
Artillery commanded by Lewis, inflicted casualties across the board.
The Norman knights were ridden down and the  Noirebrûlure  general made a sweeping advance into the next unit. They smashed these riders too but in the confusion they too were destroyed by the supporting Normans and Comte Michel de la Noirebrûlure  was ridden down and presumed dead.
On the right, Fredrich von Flintenstein, Landmeister of the Teutonic Knights, and commander of horse, saw an opportunity...
Flintenstein ordered the retreating crossbowmen out of the way to leave a path to the regrouping    Noirebrûlure  heavy cavalry. So the Teutonic Knights and their supporting mounted sergeants charged and the enemy counter-charged. 
 Whilst the nudie Frau von Rickenbacker looked on...
It was an evenly matched fight but the Holy Knights of the Hemmingsaetic League got the edge. They drove their opponents back and followed up to keep the pressure on them.

Seeing the confusion in the center with the Normans in disarray, von Rickenbacker sent in his own mounted knights in another attempt to stave in the Noirebrûlure  center.
On the left the battle continued with some minor skirmishing and plenty of arrows and quarrels flying through the air. This resulted in a couple of units needing to take break tests and one or two broke and ran. But the threat was building in front of the heathen warbands.


T'was about this time that a huge hail-storm hit Croydon. This prompted Tom to look out of the window and proclaim: HAIL CAESAR!

And yey verily the rest of us doth groaned and shooketh our heads...
~~~~~~~~~~~~~~~~~~~~~~~~~~~~~~~~~~~~~~~~~

The cavalry fight on the right continued with the Teutonic Knights again gaining the upperhand. The Noirebrûlureean Knights were pushed back again with the Teutons again following up to maintain the pressure. But now the Noirebrûlureans were disordered and close to breaking.
In the center, the Hemmingsaetic Knights charged home into the ranks of the Noirebrûlure archers. Closing Fire was ineffective and the knights hit with full force, riding down the archers and driving the survivors from the field. They then charged through into the flank of a second regiment of archers and these too were slaughtered where they stood. 
Unfortunately the knights became disordered as they rode around in wild abandon, dizzy with the fruits of their victory.
At the same time the now regrouped Norman knights charged home and rode down a third regiment of archers.  

The Noirebrûlure center was in bad shape as was the right flank. Their division of horse was now broken and the remaining troops fled the field and the remaining infantry were facing down the massed ranks of the Hemmingsaetic heavy foot.

As the sun fell in the west the Tutonic Knights finally overcame their enemies and put them to flight but at a heavy cost to themselves as their ranks were now Shaken and unable to follow up their victory.
The knights in the center attracted the tender mercies of some billmen who moved in and, with murder in their hearts, started to chop them up. Whilst on the left the heathens had had enough and decided to charge headlong to battle the heavy cavalry and infantry facing them.

Against the enemy infantry, they fared well and even against the knights they, surprisingly did better than expected. They did lose the combat by a couple of wounds and, as a result, needed to take a Break Test...

So a big chunk of the heathen warbands ran and, in their wake, left a gaping hole in the line. The Noirebrûlure commander on that flank (Lorne) was able to make a Sweeping Advance because his knights had counter charged. This opened the way for the Noirebrûlureans in the next turn...
But on the far left flank the heathen foot, charging through the woods managed to catch another regiment of Noirebrûlure knights flatfooted and sent them packing.
As the sun set, the Norman archers in the center paid a heavy price for the flight of the heathens. 
In conclusion...

With the setting of the sun the battle was over. Both sides were beaten up but the Hemmingsaetic League still had reserves of infantry and horse in the center to counter the Noirebrûlure breakthrough. On the right the Teutonic Knights had managed to rally and get themselves back in order ready to sweep around the flank and rear.

With Comte Michel de la Noirebrûlure missing (and presumed dead) I believe the Hemmingsaetic League could finally claim a victory over their arch rivals and nemesis: Noirebrûlure.

And... We've already teed up another battle in a few weeks time.