Saturday 21 September 2019

Hodges Gets a Gong

It was a cold rainy day at NWA in Croydon but Leith & I played a game of Chain of Command. The game was set up by Leith using his 28mm Pacific Australians and Japanese. I was given a choice of which side to play so I chose the Aussies because was familiar with the British platoon & I figured they wouldn't be much different ( was guessing the Japanese would be very different - and I was right).

So Leith set up the table with some very nice terrain and we rolled for a basic scenario: The Probe... We rolled to see who would be the patient an who the doctor... I mean attacker and defender. I was the defender.

Just to let you know, and for the sake of those without a sense of sarcasm - Any insults I
fling here and there are purely for dramatic and historical purposes. If I was playing the
Japanese I would write this AAR from their point of view and insult the Aussie's accordingly.
~~~~~~~~~~~~~~~~~~~~~~~~~~~~~~~~~~~~~~~~~~~~

The Patrol Phase:
As you expect, it was quick and simple. I pushed to my left where I thought the terrain was thicker and more beneficial. Leath pushed into the center and further to his left.
My jump off points are in blue  and the JOP on the right is actually on the table edge out of shot.

Support-wise: we rolled 4 points - so I got 2pts and chose 2 barbed wire entanglements. These I placed on my extreme right to drive the Japs in towards the center. The Japs took a grenade launcher/mortar section and an MMG section.

The Japanese Advance:
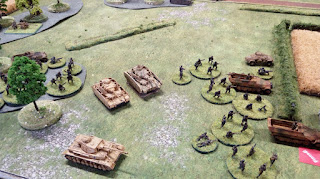
The Jap's came on. And they kept coming on... Three phases in a row. Fortunately, many 4's were rolled as well as a couple of 5's so the onslaught wasn't as overwhelming as it could have been, but most of them got onto the table before even one Aussie poked his head up.
But finally, my troops started to arrive. I rolled well and brought on two sections, one on the left and one on the right. Both took a tactical stance. The 2" mortar and the platoon sergeant came on in the center. He ordered the mortar to fire HE to no effect. The Jap's, in retaliation almost killed the lone Sgt but he survived with a minor wound and no effect on the Bad Things Happen table.

There's the missing JOP - Right there!
The Jap's started moving forward with their next phase but they were a little slow. However, a MMG moved into a good firing position that was due to give the section on my right a hard time. My last section deployed into the large tin building in the center and took up defensive positions. The blokes on the right moved into the crop area. 2 Section on the left, led by the almost famous Corporal Hodges, crept forward uncertainly.


Then the Jap's opened up. Machine guns, mortars,  rifle sections... everything they had. They killed several of my Aussies and my own shooting was pretty ineffectual. I was getting hits but not causing any damage. 


On the left 2 section under Corporal Hodges moved forward towards one of the huts near the center-left. The other two sections were getting hit hard by Tojo without doing much in return. The mortar tried laying a smoke screen but it was off target. They also fired their last HE which had zero effect.

It was about this time that I remembered that the scenario had a victory objective: Get one section off the enemy's table edge.
So, 2 Section moved to the left by squads (the rifles moved while the Bren team fired). A lucky shot by hit a Jap section leader and knocked him out. In the following phase this section couldn't shoot at Hodges and his men, which was a lucky break because a second attempt to lay smoke went awry again.

However, the other Jap's put on the pressure. The section leader on the right took a wound and my force morale took a hit. The Bren team in the big tin building routed and my force morale took another hit (I should have noted that my starting morale was only 8 compared to Leith's 9), so now my force moral was sitting on 6!

Desperate times. But Hodges was creeping through some thick jungle to the left (for a run move - I rolled 2, 2, and 1 on 3d6. With a -1 to each dice that was a total move of 2" and a point of shock on each team!).

My next command  roll seemed pretty crap with nothing that could get Cpl Hodges & 2 Section moving but... I had two 2's to make a 4  and my platoon commander wasn't yet deployed...
And he got 2 section moving. And that wayward smokescreen came into play and covered their movement...
Look at that Jap section at the top of the pic behind the smoke (they're the ones with a knocked out section leader). They let out a mighty cry and charged...

Through the smoke they came and Cpl Hodges had his men ready. The Aussies took two casualties but they wiped out the Japs to a man!
I rolled six 6's and two 5's.
The command dice for the following Aussie phase were, once again, bloody awful. But all those 4's did allow the Pl Commander to move up and use a command initiative to get 2 section moving again. And so they made it to the table edge and snatch victory from the jaws of defeat.

No doubt, the plucky Hodgy led his section into the rear of the Jap menace and rained terror on their ranks.

Conclusion:

It was a hard fought game and it looked certain that I was going to lose. My shooting was awful. My troops were hitting but failing to cause any real damage. At the same time Leith's shooting was slowly wiping me out.

And it is true that I remembered that the victory objective and that I had a section well placed to take advantage. I also realised that Leith got too involved with killing my troops and had lost sight of the objective. So that helped.

Having said that, it did come down to the wire. My other two sections were just hanging on by the skin of their teeth. My sergeant was wounded as was one section leader. One more Bad Things roll and the Aussie's were done for.

Thanks to Leith for a great game. Only my third of COC, but I'm getting the hang of the rules now.


Tuesday 17 September 2019

Look What I Made.

Yes... I made this. And you're probably asking yourself: "What is that supposed to be?"
Well, good reader, it's my new terrain mat. A new Desert Terrain Mat! 
I made a desert mat a while back and while it's very nice it's not what I really want. I even made some terrain pieces only a few weeks back which are also quite nice. Unfortunately they match the old mat.

How I made it:

1.   I bought a 2 meter piece of a strange, sand coloured faux-suede material. It's very thin but very strong. It cost about $20.

2.   I bought a box of Ty-nee Tips Tea
3.   I laid the material on a table and then mixed up a big pot o' tea (about 2 liters). I strained the tea and kept the leaves separate and let it all cool down.

4.   I sploshed the tea all over the material with a soup ladle and then rubbed the tea leaves into it.

5.   I then gathered it up and laid in on some clothes drying racks out in the sun.

6.   I then threw instant coffee all over it and rubbed it in.

7.   I let it dry.

8.   I shook off all the tea leaves and excess coffee.

9.   And now I have a very portable desert mat for under $25 (material - $20, tea - $2.40 - awful crap coffee that's been in the kitchen for a year or more - $...?, sunlight - Free!). 


~~~~~~~~~~~~~~~~~~~~~~~~~~~~~~~~~~~~~~~~~~~~~

It smells like a Greek coffee shop at the moment, but that will fade with time. I'm pondering whether to fix some minor vegetation to it (little clumpy tufts). I might just make up a mix of grit/kitty litter and little pieces of clump foliage to scatter where and when needed.

We'll see.


Saturday 7 September 2019

Welcome To My Salient

So sang Alice Copper back in 1975 (well, he sang something similar). Today I played a game of Battlegroup in 15mm!

I think this is the first time I've ever played WWII in this scale.

The game was put on by Leith at the NWA, Croydon venue. The action took place in the Kursk Salient 1943 using the original Battlegroup Kursk rules. So plenty of armour, big numbers of troops and some weird and wonderful units were the order of the day.

I played the Russians with my former opponent Tom as my ally this time around. We commanded a battalion sized battlegroup from a Guards Tank Corps. We were facing the Germans in the form of Piotr, Jeff & Leith commanding elements of an unidentified panzer division.

All the models and the table were supplied by Leith. And because this isn't 20mm it won't be appearing on my new blog. Because that would just confuse things even more.

Roll many Sixes.
Roll many Sixes.
For the Motherland Roll more Sixes than the Hitlerites
or you will go to the gulag.
And so will your dog.
(from an old Soviet era battle hymn)
Starting Moves:

The table was pretty large - 12' x 4', and we were playing long ways.
The game started, as many Battlegroup games start, with a little recce phase before the main battle. Unfortunately this recce phase only lasted for 1 turn (determined by a 1d6 roll). So not much happened. So I, Colonel Ivan Hemminksikov. moved our units on the board and that was about it.

We moved into the center. Put a sniper into a house and moved our armoured car to the center crossroad. It was only later in the battle that 2IC, Major Tomazs Tomazsivich realized that we had forgotten to deploy our second armoured car and light recce tank.
 Anyhow, the Hitlerites moved onto the battlefield first and like the facist cowards that they are they lurked around the back and hid from sight.
Unlike our brave Soviet troops who moved boldly into action to crush the Hitlerite menace and wipe them from the face of the world!
Pardon me (we had an NKVD officer so we must be seen to be good Soviets... Or else!).

I, Ivan Hemminksikov moved infantry with some armour support on the left. Tomazs Tomazsivich moved his armoured company with tank riders to the right. We also moved our on board artillery - a Katushya battery onto the table ready to do some hard hitting.
 Onward Soviets. Onward to victory!

Meanwhile the Hitlerites moved onto the battlefield. Like maggots crawling around the carcass of a swine they moved their inferior tanks into position.
The first attempt to call in an artillery stonk was called off due to inaccuracy (see the little spotter-round marker in the middle of the table.)

So our brave troops continued to move forward to repel the Hitlerite menace. We had plenty of orders to use and plenty of reinforcements to bring on. Our main tactic was to use infantry on the left where the terrain was more closed and armour on the right where the terrain was more open. We also moved the second T34 company on to the right as a reserve.
Following the failure of the first artillery stonk the forward observer knew that his future well being was on the line and that he'd better pick up his game. And this time he did well.
This time Comrade Stalin's Organ really gave the fascist invader a good rogering.
Twelve dice: 2 direct hits and 8 pinning hits. Two Pz III's took the direct hits and both were destroyed. Four other units were pinned. Unfortunately a Panther and Marder II were unaffected.

A second stonk from a 120mm mortar battery virtually in the same area resulted in more pinned units and an SdKfz 251 being abandoned by it's crew. Great work by our brave Socialist Artillerists! No gulag for you!


Unfortunately things started to go south from here.
~~~~~~~~~~~~~~~~~~~~~~~~~~~~~~~~~~~~~~~~~~~~
The Hitlerites Strike Back!

Onward Brave Soviets! We moved further on to take up defensive positions. My brave, and loyal comrade; Tomazs Tomazsivich, took another one of our objectives and move his armour up to destroy the invader and drive him from our land. Only a single platoon of Pz IV's faced him. Until a troop of Tigers crested the heights opposite.

 "Take that little green objective Tomazs Tomazsivich.
Take it for the Motherland!"
Meanwhile, I took a much deserved quick break after patting myself on the back for my fantastic artillery efforts and ordering the capture of yet another objective, for which I think I deserve a medal. I returned to find that my subordinate, Tomazs Tomazsivich had lost three tanks to the Hitlerite shooting. One of them was one of mine! He will be breaking rocks in Siberia before this day is out.
Things only got worse. A Panther leading the thrust on the main road targeted the Forward Artillery Observer's vehicle and sent an armour piercing shot into it, instantly killing the FO and his driver. This didn't seem so bad until it was determined that he was the only Soviet officer able to call in artillery. The others were only rated as Mortar Spotters.

Bugger. 

The katushya's were once again loaded & ready to fire but we had no one to call in their shots. I can only blame my subordinate Tomazs Tomazsivich for this oversight. As second-in-command it is his duty to remind me that I have forgotten to do important things.

One bonus for us was that the chit I drew for the dead FO was the Breakdown Chit and we played it on the Panther that shot up the FO.
 Look at the dirty Fascist dogs. Moving up and killing brave soldiers of the Motherland. 
So we continued to move up. We moved some heavier armour up to deal with the Fascist Menace but both of us were hopeless when it came to hitting anything. I moved a T34 onto the left flank with the intention of shooting up some infantry in the open. I missed. A Pz IV moved up in support and...
The Hitlerites obviously didn't suffer the same problems as they continued to knock out our tanks in the center and on both flanks.
More mortar stonks did nothing. They chewed up orders for no value whatsoever. I maneuvered tanks in the center and they missed their targets. Apparently, Tomazs Tomazsivich killed some enemy armour but this will not save him from the gulag. He is doomed and I fear that I will be the one who has to report him for his failures.
The troop of Tiger's on the hill took up a commanding position with very good fields of fire. Our T34's had a hard time dealing with them due to their frontal armour. Our 76mm guns were not up up to the task of taking them out.
It was late in the day and I sent my infantry on the left into the wheat fields towards the enemy and then, in what I can only describe as an act of pure tactical brilliance, I ordered an SU122 to move up onto the high ground and take on the Tiger troops. This saw the DESTRUCTION of one of the mighty metal monsters. And I, Colonel Ivan Hemminksikov, deserve a medal.

And Tomazs Tomazsivich should be relieved of command and deserves to go to the gulag.


Here ends my report.
~~~~~~~~~~~~~~~~~~~~~~~~~~~~~~~~~~~~~~~~~~~~
Conclusion:

The game ended due to time. We added up our BR Chits and deducted these from our Battle Ratings. The Germans ended up on 102 BR points and the Soviets on 98 BR. So it was a minor victory for Jeff, Piotr and Leith. Really, our battle rating would have been worse if we hadn't drawn the Breakdown chit.

This was a far larger game that I've played using Battlegroup. I did enjoy it but I'm not sure I'd play games of this size very often - Especially with my own 20mm kit  because it would just be too big. But I can see a company sized game in 20mm being interesting.

Using Soviets was interesting. They have a lot of units and trying to coordinate them is tricky. They can very easily end up getting in each others way. If the German commanders had more dedicated artillery assets they could have caused some serious carnage to our infantry.

We had plenty of banter and laughs during the day and the final shot that resulted in brewing up the Tiger was unexpected and pretty funny: "You need to roll a 6. A SIX!" - "You need another 6 on two dice: A SEVEN!"

Thank you to everyone for a great game. I have absolutely no idea what was happening on the German side of the fight and look forward to reading Leith's take on the battle. I know that I've got half the facts out of order and the other half completely wrong. But this is pretty close to the events of the day. This is the official Truth according to Pravda.

P.S. And remember, my friend: If you disagree with "the Truth" you might find yourself airbrushed out of history!.