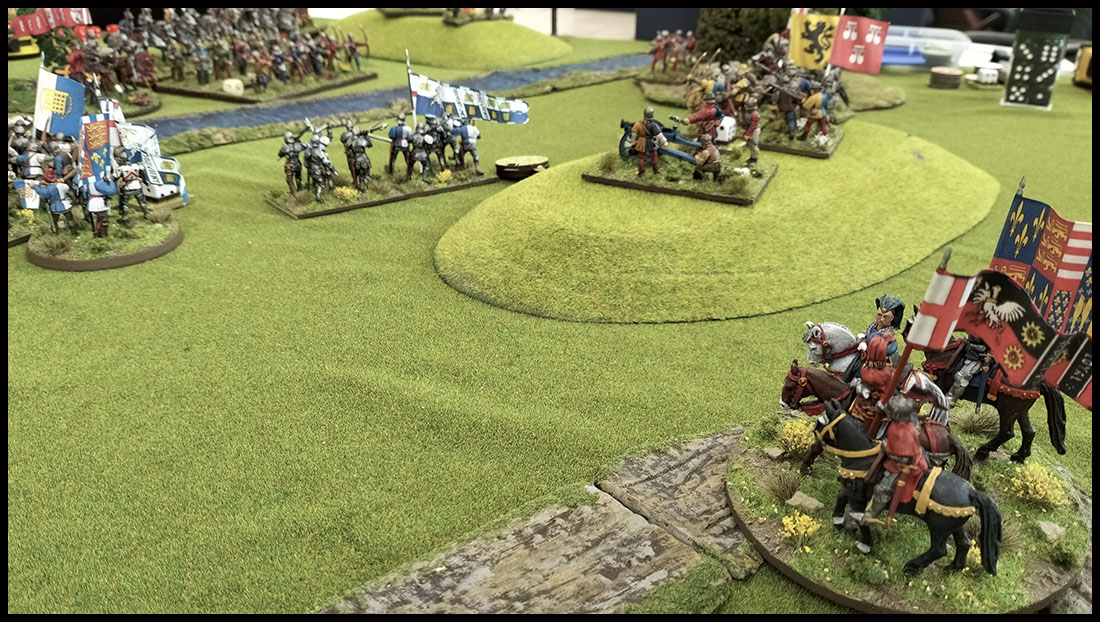
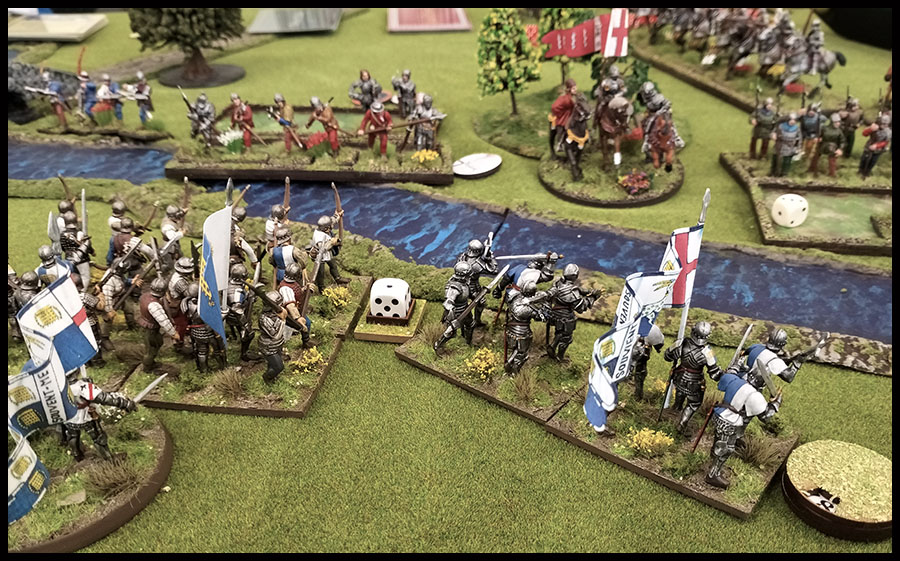
Today in the fields of England's green and pleasant land the armies of the one true King Henry VI and those of the Yorkist Usurper - Edward IV, met in battle to debate good and rightful kingship and acts of vile Yorkist treachery.
Today at NWA Tom, Alan and I played another game of Never Mind The Billhooks. It was another game of brutal combat, unexpected surprises and, as previously mentioned,
Yorkist treachery! Alan played Edward IV and Tom played Richard Neville: Earl of Warwick & Lord Falkenberg. Once again I played Lancastrians: Henry Percy, Earl of Northumberland in command with the Duke of Exeter, Owen Tudor and Lord Roos. This is the first time I've used my Percy in anger.
I deployed Exeter on the left, Tudor in the centre Northumberland on the right behind Roos's Heavy Horse. Queen Mary was picnicking with Buckingham in the forest waiting for the battle to commence.
King Edward placed his cavalry on his left, opposite Roos and took his own position next to them. Warwick took the centre and Falkenberg the Yorkist right beside a stream and behind a small copse of trees.
The armies began to manoeuvre with Tudor advancing in the centre and Exeter lining some hedges. Edward and Warwick both advanced towards Exeter but where was Falkenberg?
Covered by the small woods, Falkenberg forded the stream and advanced towards the bridge. The only Lancastrian troops on that side of the stream were some mercenary crossbowmen.
The
Manoeuvre Phase ended when Warwick's archers targeted Exeter's archers and the arrows started to fly from both sides.
"Be bold and advance!" cried Lord Roos. But then he noticed the Yorkist crossbows and advanced with less boldness.
However, as fate would have it the crossbows advanced in an effort to bring down some of the Lancastrian cavalry. This tactic failed and enabled Roos to catch the crossbows flatfooted. The knights ran right through the skirmishers killing all of them and running straight into Edward's block of bill and bow.
The commander of the Yorkist heavy horse saw an opportunity for fame and glory. He charged past the Lancastrian horse and straight at Lord Percy's foot knight.
As the Queen looked on, Percy's knights faced down Edward's mounted knights and cut down horse and man in a brutal, one sided fight which saw the Kings' knights destroyed and the unidentified commander driven from the field to face the wrath of his king.
The battle was looking good on the Lancastrian right wing.
On the left wing, Falkenberg was manoeuvring his troops to try an assault over the bridge. Exeters men-at-arms awaited them.
In the centre Tudor advanced with his Welsh archers to the fore and an intimidating block of French mercenary pike behind. The Welsh were targeted by the archers of both Warwick and Edward as well and a cannon. But they screened the pike and when the time was right Owen Tudor lead the intact French pike into Edward's troops.
The King's troops were now under pressure from both Tudor's pike and Roos' heavy cavalry.
The remnants of Edward's billmen were driven back through their supporting archers but eh Tudor pressed the attack. Edward, the Yorkist usurper, escaped without injury but stayed with his beleaguered men.
Roos didn't fare well. Behind the archers they initially charged were foot knights. Not the expected billmen. They took hard casualties and Roos was killed but they stayed in the fight and kept up the pressure on the Yorkists.
Thinking that Roos was about to breakthrough Edward's flank and seeing the threat to Exeter, Lord Percy changed the line of his advance and marched straight at Warwick. If Edward could be driven back and Neville with him this day would lead to a grand Lancastrian victory!
On the left flank Exeter expected his men-at-arms to sell their lives dearly for the crossing of the bridge. But they didn't. They took light casualties (3 from 12) and lost the combat by a very small margin (1). They took a Moral Crisis Test... And ran like a pack of whipped curs (rolled a 3 on 2d6). Exeter's archers were also wiped out by Warwick's archers and skirmishers (although they stood until only 1 man remained and he even killed one more of Warwick men with a well placed arrow.).
In the centre Tudor's pike continued to push and destroyed Edward's bill and bow but failed (three times) to get the King who escaped and joined his other block of troops now that the Lancastrian Horse had fled the field. Northumberland's archers poured several arrow storms into Warwick's men and caused plenty of pain until such time as his foot knights could take the lead.
Meanwhile Falkenberg charged into Exeter again. They won the fight but this time, with the Duke leading them directly they stood their ground even though they took heavy casualties.
Tudor managed to halt his troops and turn them around but a "bonus card" played by Warwick prevented them from being able to charge his flank and he took advantage of this to charge Percy before he could reinforce his knights with his billmen. The Percy's took hard casualties and those remaining fled.
The possibility of victory was slowly turning into the certainly of defeat.
As darkness fell (time to get going) a final melee took place. Warwick's knights charged the Percy bill and bow. The archers took aim and killed 3 foot knight and the ensuing combat saw another two killed. Unfortunately the archers themselves were also wiped out.
Seeing the turn of battle it was time for Queen Margret to vacate the field and seek safe lodgings.
~~~~~~~~~~~~~~~~~~~~~~~~~~~~~~~~~~~~~~~~~
Once again it was a really entertaining game. This is my fourth game now and I'm really enjoying it. We're getting much more out of the rules and understanding them a whole lot better so that the games are flowing really well. There are always unexpected events and results. Just when you think you've got victory in the bag something comes along to thwart your plans (well at least my plans keep getting thwarted!).
Thanks to Tom and Alan for a really great game. I look forward to the next one.
P.S. Alan is a man with an uncanny ability to roll more 6's in one game than I have rolled in my entire wargaming life!!! (Or so it seems to my poor troops).

 In doing this re-basing the units in my army grew in number because each unit went from 15/16 figures to 12 figures. I originally had 14 units - bill & bow, dismounted knights, pike, plus handgonners and mounted knights. This has now grown to 20 units with the inclusion of the new unit of Hobilars below.
 My Henry VI and the Margret of Anjou bases are not really command bases for purposes of Billhooks they are more like vignettes to add a bit of colour and interest to the proceedings and to show the possible position of the monarch.

 Because my bill and bow units had more archers than billmen I ran into a bit of a problem with filling out the units. I had the option of painting more figures or just amalgamating units. In the main I decided to amalgamate, although I did need to paint up about half a dozen figures to fill up some gaps.

 Then there's these fellows below: They're left overs. I can't let them go to waste and I still have plenty of figures still on the sprue so I think they might be the starting point of a potential Yorkist army.


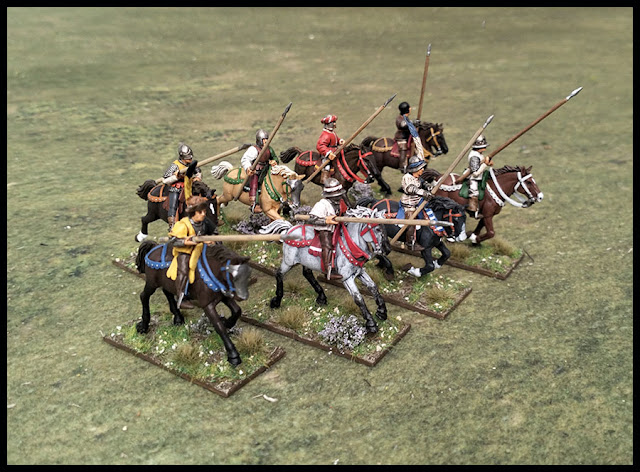

 I could have painted them with pretty subdued colours but I decided to paint them in a variety of panoply based on the retinues I already have. They came out pretty nice and add more colour to a pretty colourful army.