May 8th was International Viking Day so this week we at NWA decided to re-fight the fateful clash where Harald met Harold at the Battle of Stamford Bridge.
Last time we played this was in 2016 as a series of the 1066 battles. This time around we changed the terrain according to a map I found in a
All About History publication. The last effort was a large, somewhat flat table and it took a lot of time to get the troops into battle. The smaller table this time around made for a much quicker game (as did the massive carnage at the end).
As we did last time, we used
Hail Caesar for a quick and dirty game.
So, on to the battle.
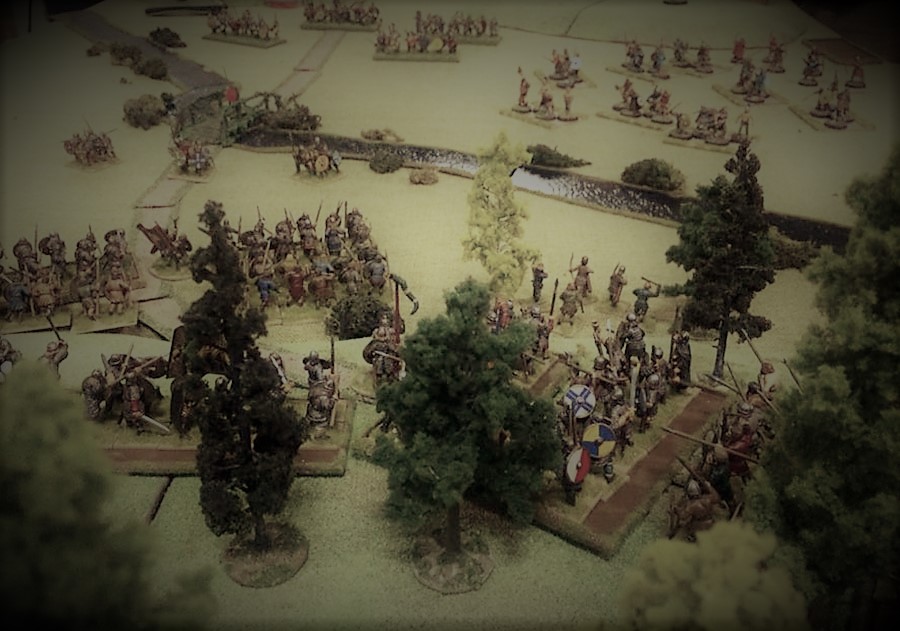
As history tells us, the Norse invaders led by the renowned King Harald Hardrada and the traitor Earl Tostig Godwinson, were hanging around sleeping off the celebrations of their battle at Fulford and the pillaging of York. They were totally unaware of the Anglo-Saxon army led by King Harold Godwinson that was about to descend and wreak carnage on them.
The Norse were in disarray - every unit was disordered requiring Hardrada and Earl Tostig to rally them into shape. Some units were on the Saxon side of the bridge and had to either regroup themselves or flee across the bridge to safety before the Englishmen caught them.
As often happens in wargames, things don't always go to plan...
The English army stood ready to pounce with Earl Leofwine Godwinson leading. But Earl Leofwine decided to stop, review his troops, give them some rousing words and hurl insults at the disorganised Norse (he failed his first
Command Roll to his left wing).
Seeing this the King used his authority and ordered Earl Leofwines right wing to charge. But the messenger got lost somewhere or got caught up in the hurling of insults and forgot to deliver the order.
Earl Gyrth Godwinson's troops were still in the hills waiting for his brother to move forward. At least he managed to push his small group of archers forward and inflict some casualties on the fleeing Norsemen.
Earl Leofwine leading from the front inspiring his men.
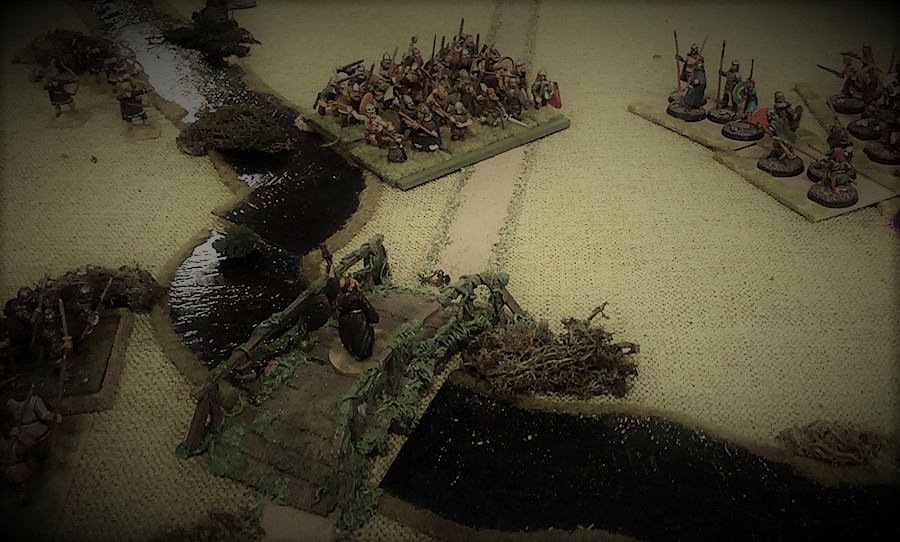
Given this reprieve, the Norse decided to flee across the bridge whereupon a lone vikingr stood firm to hold back the entire English army.
King Harold and Earl Tostig then set about getting their troops in order.
Seeing the quarry running like frightened hares inspired the English to advance. But the lone viking had first to be overcome.
First one brave English warrior advanced...
Then another English warrior advanced...
Still another brave English warrior advanced...
All the time the Norsemen were getting themselves into order with those that fled across the bridge reforming into a solid shieldwall as another unit moved up behind them for support.
By now the unnamed Viking on the bridge was down to 1 wound from 3.Sseeing their wounded comrade on his last legs inspired the Norsemen and they charged back across the bridge, with the wounded viking in the lead, straight into the waiting English thanes beyond.
The might clash of shield-walls threw the English back but as fortune would have it they remained in good order.
The Norse decided to press their attack but this left the bridge undefended and Earl Gyrth, who had moved up on his brothers' right, took advantage and lead his men across at the charge into a another group of Norsemen. Leading from the front, Earl Gyrth drove the Norse back in disorder then turned into another group on his flank and driving them back too.
The Bridge had been crossed and the great hoard of the English army pushed forward to get across.
Meanwhile Earl Leofwine had forced the Norsemen, now stranded on the wrong side of the bridge, back in a brutal fight that eventually saw the invaders cut down to a man.
Hardrada seeing the danger lead his best men, the men of his household - his Huscarls, into the flank of Earl Gyrth driving the English back to the riverbank in disorder.
Gyrths' other troops crossed the bridge in an effort to support their earl but King Harald pressed the attack and drove the floundering English into the river to drown under the weight of their arms. However, Earl Gyrth managed to escape this grizzly fate.
With the skill of an experienced warrior King Harald turned into the flank of those men crossing the bridge driving them from the bridge along the riverbank into a ring of waiting Norse.
Hardrada moved in, to close the trap.
King Harold, joining his brother Earl Leofwine at his side, now drove forward to inspire and lead his troops from the front. Here the Godwinsons' were met by their traitorous brother Earl Tostig now leading a group of Norsemen trying to drive the his brother, the King, back across the river.
King Harold asks: "Why am I standing in the river?"
The Kings' men seeing the traitor fought back hard and a great slaughter ensued wherein Earl Tostig was cut down and trampled into the mud and the King, seeing his brother Gyrth surrounded charged into the back of Hardrada himself and with another great effort slew the Norse King's huscarls who stood side by side with their king as, he too, was cut down.
In a few short minutes of battle the Norse leadership was wiped out. Where was Eyestein Orre with the reinforcements?
In a fit of rage at the loss of their king the Norsemen slaughtered the remainder of Earl Gyrths' men, driving many more into the river and stormed forward into the flank of King Harold's men.
A frenzied fight ensued with the Kings' men managing hold off the worst of the enraged invaders...
The English lost the fight by a small amount and
had to take a morale test at -1 on 2d6. The roll was:
...but exhausted by the fight with Hardrada's huscarls they broke and fled back across the bridge. Every man for himself.
All three Godwinson's were alive on their side of the river but the English army was shattered. and only one man had the courage to stand on the bridge to stave off the heathen horde:
Brother Eggfhart of Stenchwood Abby.
And so the English lost the re-fight at Stamford Bridge. The delay in the first turn and the viking on the bridge allowed the Norse to get themselves organised and ready to put up an effective defence.
Eyestein Orre can now count his blessings. It looks like he might be in line for Kingship.
Conclusion:
It was a great game. Fast moving, hard fought with plenty of action and many unexpected and funny moments. The players were: Norse ~ Mike as King Harald Hardrada, Ants as Earl Tostig, John as Eystein Orre (he didn't get on the table but he cheered his side to victory). English ~ Chee as Leofwine, James as Gyrth, and Me as King Harald Godwinson.
Overall, I didn't control any of the troops that fought but I guided my comrades who'd never played Hail Caesar before. As the king, I just contributed dice to combats. My troops (
the best ones the English had) didn't make it across the bridge.
Next, it's Hastings again!
And as usual, here are some better photo's taken by Charles and Chee:
Chee looks on with concern.
King Harold looks on as his troops move forward.
These 1967 Batman camera angles will twist your mind.
Those nasty huscarls.
The Good Brother Eggfhart, blessed be his name.