Sunday 31 July 2016

Another NCiM Test Game

Another game of Napoleon's Campaigns in Miniature was called for so that we can become better re-acquainted with the rules and start making some changes to the basic play.

The rules themselves, after a few games, seem pretty solid. The movement, shooting, calculation of casualties and such things are all starting to fall into place so that the speed of play has quickened compared to our initial games. The major stumbling block that we came across today (and previously) is Melee Results.

Like shooting, the rules for melee itself are pretty solid but the resulting morale and control tests are confusing. It took us the better part of the final hour of the game to sort out a workable solution which goes like this:

a) - The loser of the melee immediately retires 50mm and takes a morale test. (This is straight from the rules)
b) - In the following turn the results of the Morale test are enacted as a "Compulsory Move" if the result is Retire, Retreat or Rout. (This is something we will introduce as part of a "Turn Sequence" thingy).

c) - Regardless of the result the winner of the melee (in the previous turn) will now take their Control Test. This could result in the winner Retiring, Holding, making a Controlled Advance or Running Amok! (Well, variations on these themes anyway).

But I must say, I'm writing this from memory and our solution may be slightly different. I did take notes but I don't have them on my right now.

Anyway, here's some pics from the game.
Note: my nice new gaming mat that I made during the week!


The Polish brigade advances onto the table and start to shake out.


A couple of well dressed Polish officers chewing the fat overlooking the battlefield.

I finished my first squadron of the Brandenburg Uhlan Regiment.

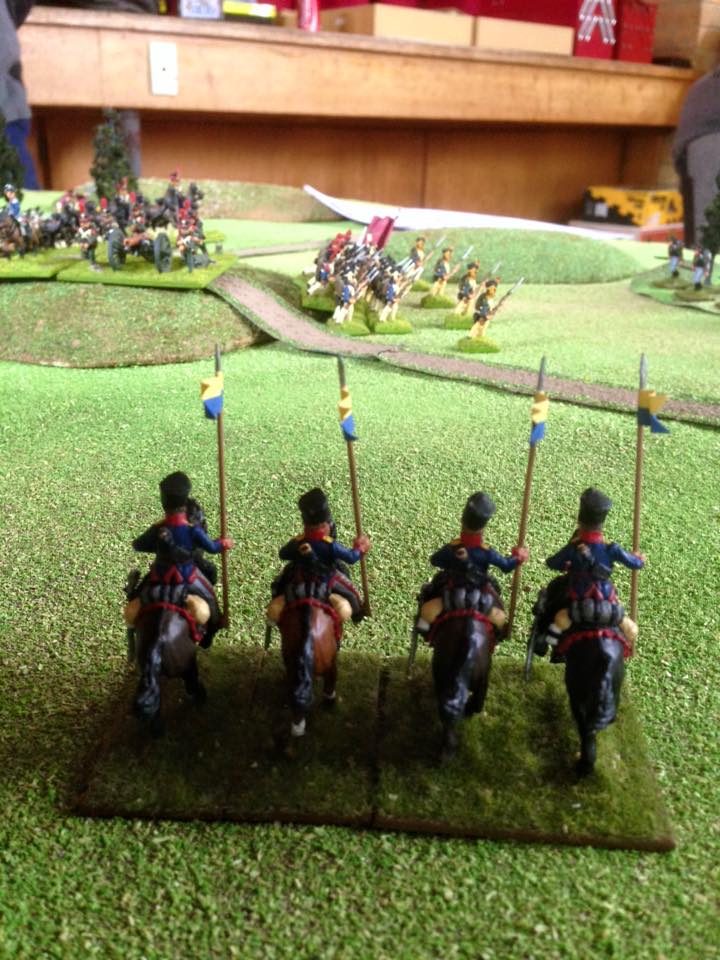
They did about as well as they did last time. I really need to add to their numbers.

 I also had a troop of three 6pdr guns which made a surprise appearance and helped drive back the Polish battalion on the far right of the picture with some nasty fire down their flank.
Not bad for their debut.


On the Prussian left, skirmishers from the fusilier battalion of the 8th Leib traded shots with their Polish counterparts. As the main body of the battalion retired due to the deployment of a Polish gun battery, the skirmishers fell back.


The Fusilier battalion continued to retire in order to face toward the Poles emerging from the woods.
Skirmish combat in NCiM can take place a very close ranges. Notice in the second pic below that the fusiliers' number were significantly reduced.

The Poles setting up the melee combat that was to bring the proceedings to a halt. 
The Prussians were pushed back. Although casualties on both sides were light, the Prussians, being out front of the main position were unsupported and the morale test resulting from the melee would have had them retreating. What we couldn't work out was when. And what did this mean for the Poles who made a Control Test with the result of Hold or Advance if you so desire. 

All very confusing at the time.

I don't seem to have any pics, but on the right my Freiweilliger Jäger did well. They drew in two Polish battalions and, using the cover of the wood, managed to first drive off the Polish voltigeurs and then, with the help of the 6 pdr detachment, force the one of the battalions back.

Well done men!

Friday 29 July 2016

Quick Reference Sheets for NCiM

Well, I've been busy during the week putting together a QRS. for Napoleon's Campaigns in Miniature.

After playing a game the week before it became apparent the skipping through the book looking for charts and with a bunch of printed PDF casualty charts all over the table it seemed that a nice laminated, good quality, fully functional  QRS was required. So I got down to it. and I put my Photoshop skills to good use.

I first designed a basic page using a bunch of Napoleonic paintings and images that I lifted from the internet. I then converted all the charts and other relevant info from the book into digital charts and saved them as PDF's. From there I transferred them into Photoshop and did a bit of re-sizing and gamma adjustment stuff.

These are not perfect and I'm sure I'll find mistakes as we start to use them. There are also a bunch of things, like movement rates and formation changes that will come into dispute as we play games. As we discuss things and sort them out I'll make changes. I also invented some completely original things like the Random General Generator, the Weather chart and General Casualty thingy. These might stay or they may go. Who knows?

The idea is to print them onto a double sided A3 page, laminate it and then fold it. So then it will be a nice A4 sized folder with 99% of everything needed for a game of NCiM.

But for now here they are. these are smaller than the proper print sized copies but they're larger and clearer than the ones I originally posted on the Bruce Quarrie Facebook page. If you want them drop me a line in the comments section and I'll send the originals one to you. Just remember, they ain't finalised yet!


Friday 22 July 2016

My Prussian's make their debut

As the title says, my Prussians had their first outing on the table last night. Their numbers are small at the moment so a small fighting withdrawal scenario was devised: a Polish brigade advancing into contact with an advanced Prussian post. The Prussians, very much out numbered, are to delay the Poles and withdraw off the table to their main force.

We used some of the other aspects of Napoleons Campaigns in Miniature (NCiM) in this game. One of these being the observation and hidden units rules. This meant that initially no Prussians were deployed and would need to be located. To do this I sketched out a rough map, noted the location of my troops and wrote out very general orders.

Prussian forces were, 1 Line regiment, a Jager detachment and a single squadron of Uhlans (this is all I have at the this time). The Poles (Played by the wily, Mike Goldyn) consisted of a full Infantry brigade with a battery of 6lb's. The Poles started on two entrance points (roads), 1 move in from the table edge, so not all of them started on the table.


The First Prussian pickets were sighted - Skirmishers on the hill and jagers in the wood.


These forced the Poles to shake out into line and send their own skirmishers forward. The Prussians on the hill retreated back to their parent unit which was located behind the hedge of a wheat field. The jagers opened fire using the longer range of their rifles (300mm). This was a mistake because they were firing at their maximum range and the +2 fire factor for First Fire was wasted against a -9 range factor and - 4 factor for firing at skirmishers.


The fusilier in the wheat field reformed and took some fire from the Polish skirmishers but withheld their own fire to retain their +2 First Fire bonus (the lesson learned from the jagers).


The fusiliers stood steadfast in the face of the Polish musketry & only lost one casualty as a result of determined effort by the skirmishers. The soft cover of the hedge helping out in this case.


The jagers shot it out with the skirmishers to their front where they inflicted casualties and drove the Poles back behind the safety of their line.


The Polish forces having taken the high point of the little hill could now see the remaining Prussian troops deployed further back - One battalion of musketeers in the other wheat filed behind a stone wall and another battalion in reserve on the road.


The Jagers were driven back by volleys from the Polish line and retired through the woods in good order with two companies of Polish voltigeurs on their heels. The Pole now brought up their canon threatening the forward Prussian fusilier companies who retired on to the rest of their battalion at the other of the end of the wheat field.


The jagers regrouped and joined the musketeer battalion in the second wheat field exchanging shots with the Polish voltigeurs emerging from the woods. Over the other side of the road The Poles advanced on the heels of the fusiliers and prepared for an assault. The gunners on the hill took aim at the fusiliers to little effect.

Also... Previously unmentioned, a squadron of Prussian Uhlans were sighted at the extreme left of the Polish position. They were initially ordered to observe and retire but their orders were changed to engage the Polish line and then retire. They made a futile charge which was stopped by the massed musket volleys from the Poles and they routed. They were too close and the musket range was too short. The result of being way too slow to deploy into line. 


P.S. I didn't manage to finish painting the uhlans due to a power outage (brush in hand) the night before.

The Poles now advanced on the Prussian positions. Some skirmish fire was made against the Prussian musketeers who replied with company volley fire and inflicted some casualties. the Polish guns changed their aim to target the musketeers in reserve on the road and inflicted some injury on them. In wheat field #1 the Poles, under ineffective fire from the fusiliers shaped up for the assault...


The Prussian's fired to little effect. The Polish columns were unformed due to their advance through the wheat and struck with a reduced impact. But the assault, although wasn't decisive, had the desired affect of forcing the fusiliers back. The results of the following morale tests had the Prussians steady and the Poles following up for a second round.

Here the game was called of due to the late hour.

Lessons Learned:

Overall it was a very enjoyable game with some good lessons learned. We're still coming to grips with the rules but doing this scenario resulted in some interesting situations and brought to light some topics for later discussion.

I think that my major gripe would be the constant referral to charts. We've discussed the need for a Quick Reference Sheet and after last night I think this is a must. We had printouts of charts all over the table as well and needing to constantly searching through the book for various things. So I'll get to work on this.

I'm not really keen on all of the National Characteristics. I don't mind the Morale, Shooting, Melee Factor stuff but the individual Movement Rates and Formation Change stuff leave me cold. For a Prussian cavalry squadron to take 1½ moves to shake out into line from column is a bit ridiculous. I know I could have just deployed them into line (they were a little unit after all) but I wanted to go through the process to see the outcome.

Overall, I like the flexibility of the rules. Unlike other rules sets for Napoleonic's NCiM allows a very detailed level of play if you want - Such as my initial deployment of my fusilier battalion into company elements and their later reforming into the full battalion. This isn't something that you would normally do in a larger battle but in a smaller engagement like this NCiM allows for this type of action where other rules don't. And, after recently reading about similar scenarios that actually occurred in the lead up to Ligny, these smaller encounters were widespread throughout the period.

Wednesday 20 July 2016

8th Lieb Regiment - Done!

Well, it took me a little longer than I had planned but I finally finished the my first Prussian regiment - The 8th Lieb. I had a few issues that slowed me down (including a taxi smashing into me and writing off my car).

But I finished them and I've now started on some uhlans. They are cleaned up, assembled and base coated. I'm not sure what regiment they are going to be at this stage but I can worry about that when I have to paint their collars and cuffs.

Here's some pic of the regiment on some fancy terrain. I'm going to double the number of jagers because according to the Order of Battle that I'm following I should have two companies.


Monday 11 July 2016

Prussian Jager

Just for the sake of it and because I could get something done quickly, I painted up the jager company attached to the fusilier battalion 8th Leib Regt. It's a nice little figure from the Perry plastic Prussian Infantry set. Unfortunately it's the same figure over and over again. When I next put together some of these figures I'll try a couple of conversions. I saw some on another blog and they looked okay.


Friday 8 July 2016

Medieval Shenanigans

Shenanigans it was this very night using the rules of the Lion Rampant.
I played two games using the same scenario - Breakthrough, over the bridge to safety (with a blocking force on one side of the bridge and a force coming from the rear). I played both pursued and pursuer. And I'm happy to say the the mighty Hemmingseatic League was victorious on both occasions (a rare feat!).

Lots of colour and plenty of action with my two opponents, Neil & James providing good gamesmanship and an enjoyable evening.

As usual, I forgot to take photo's most of the time, but here are the few that I did take during the first game.

In the first game I was the pursued with Neil's, Warden of the West Marches laying in wait with some foot sergeants and foot knights guarding the bridge and a mass of bowmen coming up behind. I was lucky enough to get my mounted men at arms moving quickly (another rare feat). Bishop Eisenwurst led a group of valiant knights over the bridge into the schiltron formed on the other side. My knights were forced back but they also stove in the schiltron which was also pushed back.


At the other end of the table my Teutonic Knights moved in for the kill against the enemy bowmen.


At the bridge the bold bishop charged again this time against the Warden himself and his foot-knights. Alackaday, snake-eyes were rolled and the brave Bishop fell from his trusty steed and lay dead on the bridge of DOOM!


The Dice of Doom!


A bad morale test in the following turn and the remaining knights fled for their lives leaving the bridge empty.


So I brought up my crossbows - Who were very smartly, driven off but by killing another foot knight in the process they reduced their numbers to half strength.


But up at the other end of the table the Teutonic Knights charged and charged again. 
And again. 
And again. 
And eventually slew all of the enemy's archers or drove them off.


Moral tests ensued for the Warden's force and all his remaining troops fled the battleground. Ironically it was a morale roll of snake-eyes that saw the warden and his remaining knights flee.

Although it seems like an easy victory it was pretty much touch and go but those final failed morale tests saved the day.


EDIT: I added a few more pics courtesy of my opponent Neil.